Maple Tapping
This past autumn we decided to purchase some maple tapping supplies and try our hand at making our own maple syrup. We bought a kit that came with three buckets with lids, 3 spiles, a drill bit and a beginners guide. We also bought a funnel set with a micro-filter attached, a full size steamer pan, and a 5 gallon food grade bucket.
After doing some initial research we went outside and marked three trees that were big enough and healthy enough to warrant for tapping. After marking the trees with blue nylon tape we added a reminder to our calendar to start paying attention to the weather come mid-February. We were looking for the nights to be freezing or below freezing and the day time temperatures to be above freezing as this elicits the flow of the sap.
A few days prior to mid-February we were beginning to see this weather pattern emerge. Wanting to make sure we tapped early enough, but not too early that the tree will heal itself over the hole, we did some additional research and decided to take our chances and tap the trees since we were seeing depressions around the tree where the snow was which gave insight that temperatures were warm enough to tap.
Tapping the trees was relatively easy. We trudged through the snow and ice and drilled between 2-4 feet high on the tree, at an upward angle, below a branch or above a root and on the south facing side of the tree for maximum sun exposure. Then we tapped the spiles in, attached the buckets, and viola!

After a couple of warm days we were already noticing some sap in the buckets, which was exciting. We emptied the buckets daily into the 5 gallon food grade bucket and set that aside in the shade to keep it cool. We had about maybe a gallon as the week was ending, and because syrup can spoil after about a week, we decided to use this gallon as our test batch.

Maple Processing
After reading the horror stories online about the immense amount of moisture and sticky residue trying to process maple syrup on your stovetop, we decided to try our first batch in the steamer pan on the fire pit outside. We weren’t really prepared – we didn’t have enough dry firewood available and we started too late into the day – but we tried to make the best of it. Starting the fire around 2pm on Sunday, we had “Pickles” (our four year old) help gather tinder and get the fire going. We then emptied sap into the steamer pan, which proved to be a bit difficult since it had a good layer of ice on it.
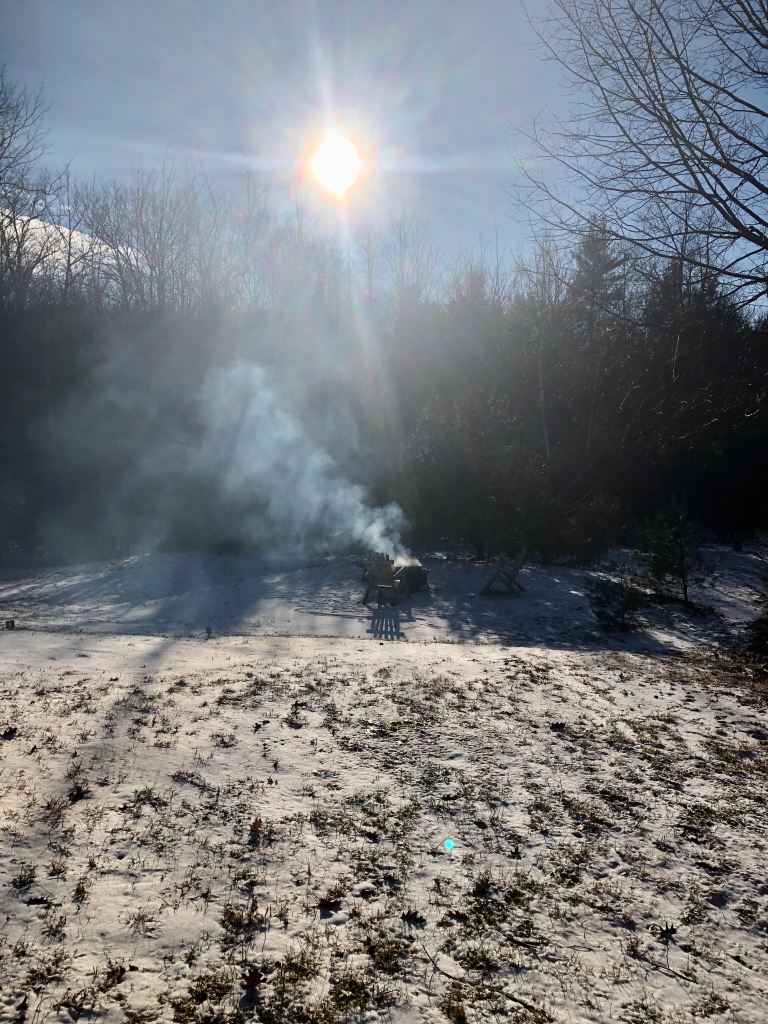

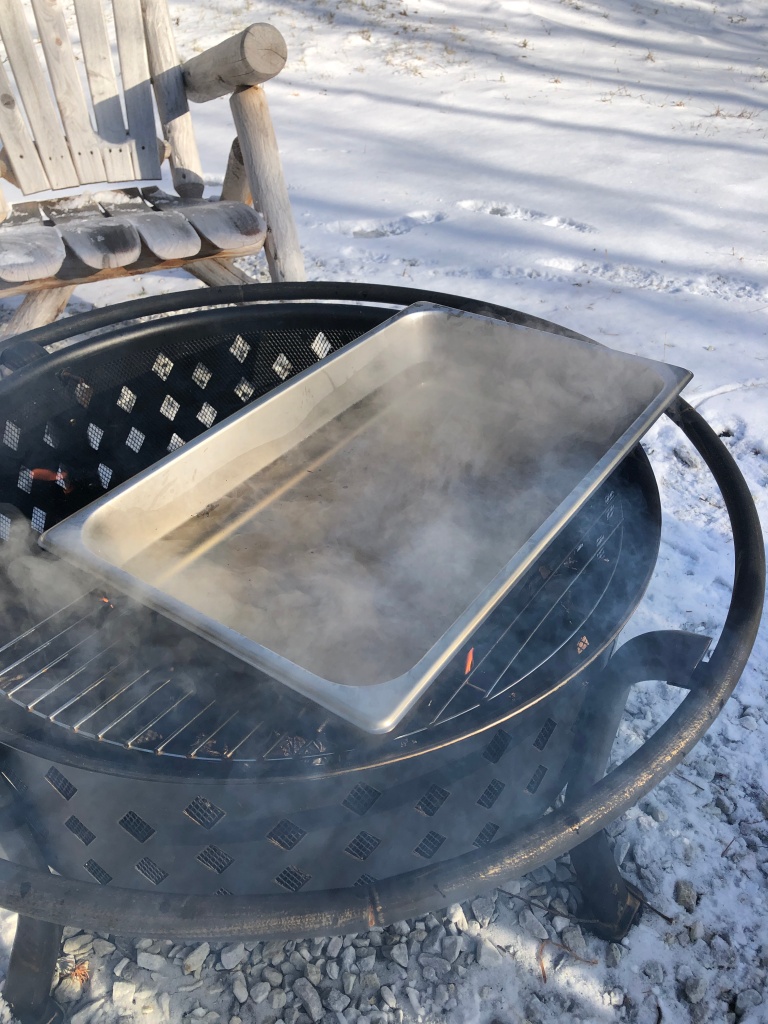
The fire helped melt the sap and before you knew it were we steaming the sap and trying to get it to a boil. After a couple of hours of adding tinder, restarting the fire, and trying to get it to work outside we realized that we didn’t have enough dry wood to get a good boil on the sap going. With daylight waning we transferred and strained the sap into a large stovetop pot using a funnel and brought it indoors.
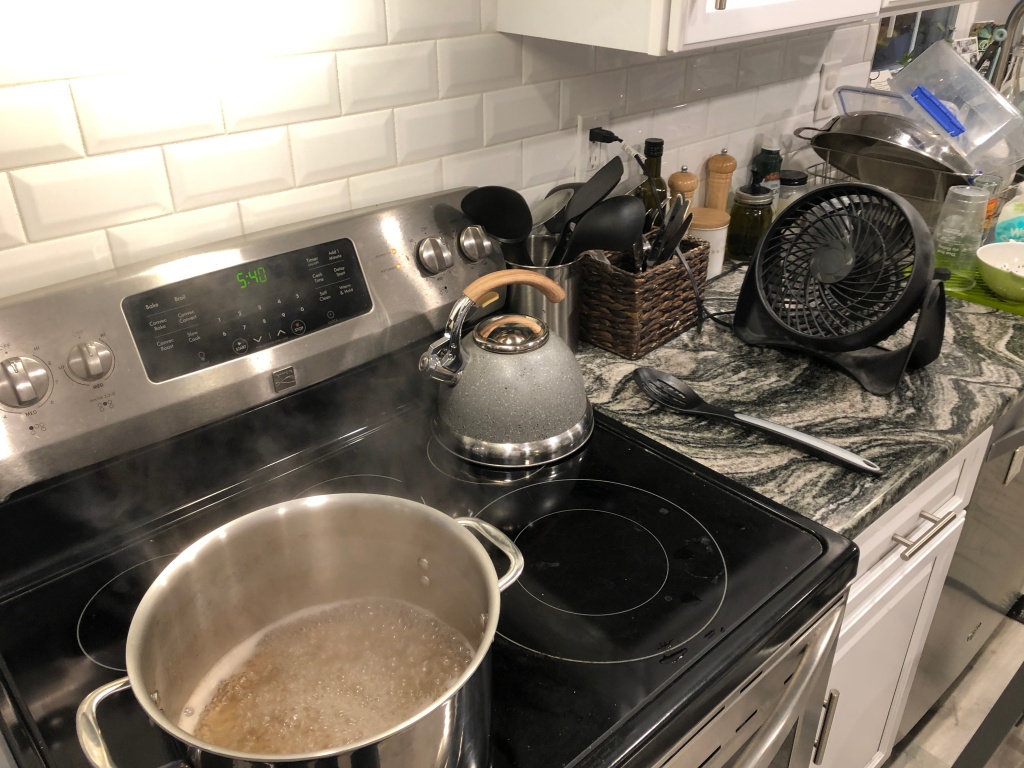
Once inside we were able to get a rapid boil going quickly on the sap and also noticed it was indeed putting off a ton of sticky moisture onto the oven vent, cabinets and wall despite having the screen door open to let moisture out. We decided to employ a small fan on the countertop to push the moisture away from the vent, cabinets and wall and towards the open screen door. This worked amazingly and kept the sticky residue from settling anywhere in the house.
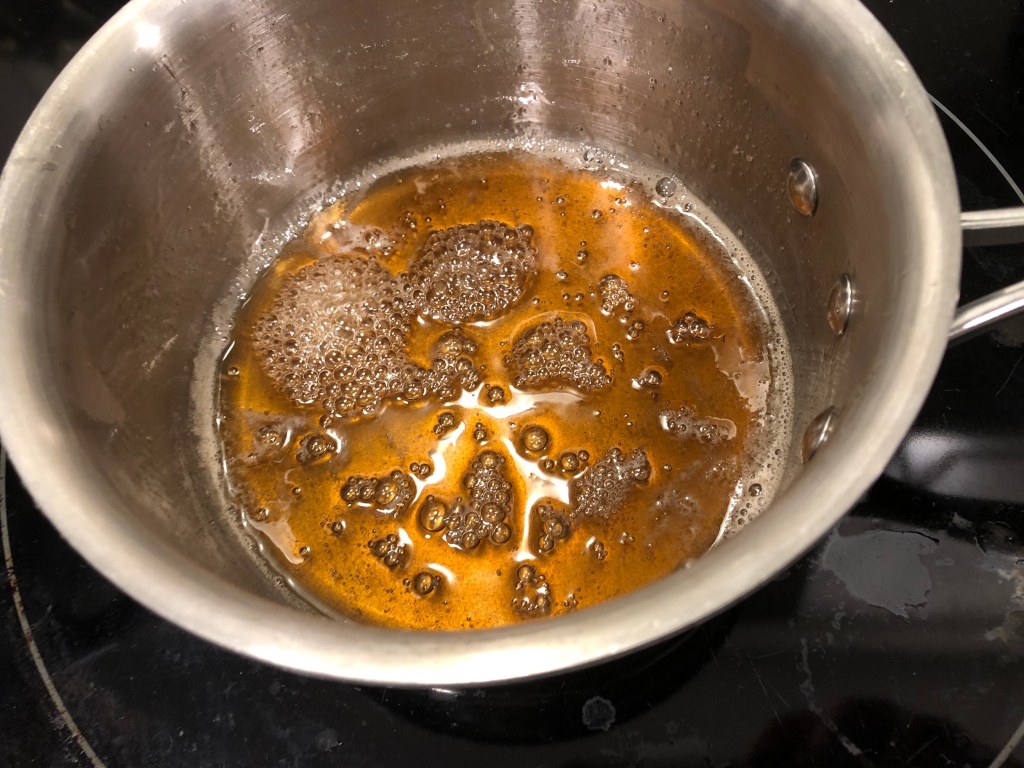
From there we kept an eye on the sap, which boiled down very quickly. We kept de-foaming the syrup as it boiled down and we watched the color changes from clear, to golden, to brown. After about an hour or so we switched to a smaller pan to allow the remainder of the sap to boil down into syrup without scorching the bottom of the pan. Soon enough we had maple syrup!

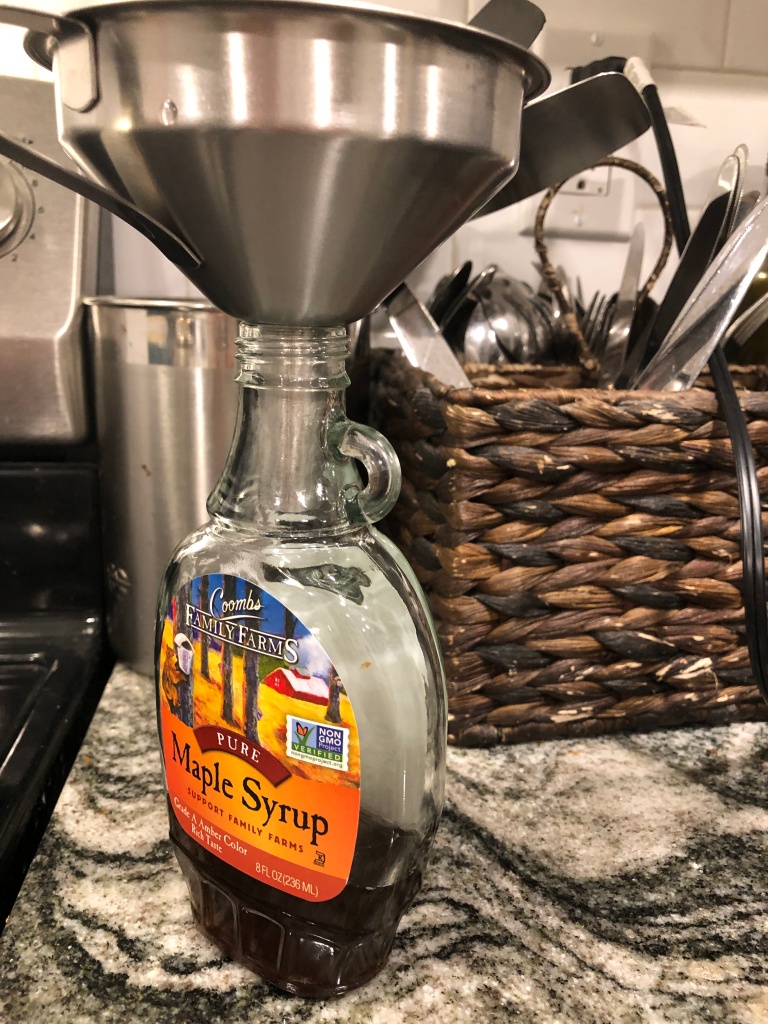
After cooling down the syrup, we sterilized an old maple syrup bottle by pouring boiling water into it and letting it sit, then used the smallest funnel with the mesh filter to transition the syrup to the bottle. The quantity produced was very small, maybe about 4 ounces, but that’s expected from that amount of sap. It takes about 40 gallons of sap to produce just one gallon of maple syrup. We do anticipate, however, that we will have more sap in the coming week or two as the weather stays warmer during the days and we have less days during the week where it stays below freezing.
Summary
Overall, this was a great learning experience. Depending on how much sap we get weekly we may just opt to boil it down inside the house like we did this time as that was the quickest and easiest path (a little over an hour to boil down), not to mention the warmest (it was only 20 degrees outside).
We learned that employing the fan inside to push away the vapors worked like a charm and that maybe we should pull the sap off the burner a little sooner next time (we slightly overcooked ours).
It was fun tapping the trees with the family, being outside and around the firepit, gathering kindling, pretend skating on the inches of ice still in the yard, and taste testing.
It was fun tasting the sap directly from the tree, which is simply sugar water, and then trying it at various stages in the process and tasting the different levels of sweetness as it approaches the final product.
The taste of the syrup was great. It had a nice smoky smell from the wood fire outside and that transferred into the taste as well. We found it interesting that the syrup we made almost had a birch bark flavor to it, though all three trees we tapped were maple, not birch. It tasted very fresh!
Resources
Stainless Steel Funnels with Removable Strainer
5 Gallon BPA-Free Food Grade Bucket
